
Tuesday, April 12, 2016


Friday, May 15, 2015
Dream Project May
I cut out all the pieces, from my hand dyed fabrics,using my freezer paper pattern and fused them onto a stiff but very thin piece of interfacing. I then did a bit of thread painting before backing with a thin batt. I continued to thread paint more extensively as you see in the progression of photos. As this is the first time I've attempted anything like this I think I would do more thread painting before adding a batt if there is a next time. Click on over to Vicki's to see what everyone else's dream project looks like.


Sunday, April 26, 2015
Series Work
Unfortunately, life has gotten in the way and not much has been happening on this front. My wet area, dye/paint space has been taken over with tools, designs, cement, painted posts and all manner of stuff for re-landscaping our entire yard areas to make them less work. Right now they are lots of work! However, I did start doing a Shibori stitch resist in circles. The pictures show some of the stitching done but not gathered up yet.


Click on over the Vicki's to see what others are working on in a series.
Monday, March 16, 2015
Dream Project
My Dream Project is to do a floral portrait. Here is my slightly altered picture I took a few years ago getting ready to tackle this idea.

I traced over the picture on regular 8.5 x 11 and took it to the copy shop and had it enlarged to the size I wanted. I then matched up some fabrics and put some snippets on the enlargement.

Next I put a plastic sheet overlay on top and traced around the pieces. This sheet will be used for placement of the fabric under it.

I traced over the picture on regular 8.5 x 11 and took it to the copy shop and had it enlarged to the size I wanted. I then matched up some fabrics and put some snippets on the enlargement.
Next I put a plastic sheet overlay on top and traced around the pieces. This sheet will be used for placement of the fabric under it.
That's the basic prep work done, now on to cutting and placing fabrics.
Hook up to Vicki's to see what everyone else's dream looks like.
Saturday, February 28, 2015
Working In A Series Base Fabric
I'm using Jane Dunnewold's 'Art Cloth' exploring surface design. I've dyed some base fabric and overdyed it in the same session. I first manipulated the fat quarter fabrics, more on that later, and dyed first in Marine Violet and second in Cerulean Blue.

Working left to right: this fabric was folded in squares and 2 canning lids were clamped on each side making a fabric sandwich. The blue, second dye, seemed to make no impression at all. The next piece was accordion folded and laid in a tray to dye, next one was also accordion folded but stood up in the tray and seems to have sucked up more dye than the one laying down. Last piece was scrunched in an onion bag, dyed purple, fixed, rescrunched, put back in the bag and dyed blue. Lots of texture in that last one.
These pieces will be the base for more techniques applied to them.
I also made up some markers for applying paint. Mostly legumes glued, dried and then painted over for protection. Bonus, legume drawer cleaned out! Also some glued down string and corks bundled together.
Discharging is one of the techniques coming up and I'm finding it difficult to find the product that stops the bleaching action. Can find the discharging stuff but not the stop so I'm not sure what I will do about that.

Click over to Vicki's to see what everyone else is working on.
Working left to right: this fabric was folded in squares and 2 canning lids were clamped on each side making a fabric sandwich. The blue, second dye, seemed to make no impression at all. The next piece was accordion folded and laid in a tray to dye, next one was also accordion folded but stood up in the tray and seems to have sucked up more dye than the one laying down. Last piece was scrunched in an onion bag, dyed purple, fixed, rescrunched, put back in the bag and dyed blue. Lots of texture in that last one.
These pieces will be the base for more techniques applied to them.
I also made up some markers for applying paint. Mostly legumes glued, dried and then painted over for protection. Bonus, legume drawer cleaned out! Also some glued down string and corks bundled together.
Discharging is one of the techniques coming up and I'm finding it difficult to find the product that stops the bleaching action. Can find the discharging stuff but not the stop so I'm not sure what I will do about that.
Click over to Vicki's to see what everyone else is working on.
Friday, February 6, 2015
Working in Series - Art Cloth - A Beginning
The first exercises are about dyeing fabric and over dyeing fabric with resists. You can get markedly different results with the type of dye you use; either pure dye or compound dye. The compound dye is made up of several different pure dyes and they may strike at different rates. My first exercise was to find out what dyes are used in each of the compound dyes I have in my studio. In all my studying about dyes this has never been suggested and I think it is a great idea. You cut small pieces of PFD fabric, spray water on it and then sprinkle a tiny bit of dye powder and the different dyes that make up that particular colour will be revealed. I did have some difficulty with this as my dye powders were statically charged, making them hard to control. But here is the outcome of this exercise.

Next I need to choose which colour to use as my first dye bath and get my base colour dyed. Then these pieces will be used in the exercises that follow.
Pop over to Vicki's to see what everyone else is doing in their series.
Next I need to choose which colour to use as my first dye bath and get my base colour dyed. Then these pieces will be used in the exercises that follow.
Pop over to Vicki's to see what everyone else is doing in their series.
Saturday, January 3, 2015
Direction for the New Year
I'm joining the challenge, " Working in a Series" lead by Vicki Welsh. I've always been interested in working my way through a book's exercises in a subject I'm interested in. I've done this with a bread making recipe book on Cooks' Talk years ago where we all chose a book to cook our way through and reported on the recipes' successes and failures. It was fun and I got to love my book even more for the great recipes I wouldn't have tried otherwise.
So that is what I have chosen to do for working in a series, and Jane Dunnewold's book, "Art Cloth, a guide to surface design for fabric" is my choice. I purchased this book many years ago at a quilt show not knowing when I would get a chance to actually use it. Now is my chance. Let's have some fun.
So that is what I have chosen to do for working in a series, and Jane Dunnewold's book, "Art Cloth, a guide to surface design for fabric" is my choice. I purchased this book many years ago at a quilt show not knowing when I would get a chance to actually use it. Now is my chance. Let's have some fun.
When Last Seen
An update on the completed quilt from the HST posts below; it has been finished for some time but I cannot get far enough away from it for a picture, it's 85 x 85. If I ever manage to shoot it, I will post the picture. What I didn't realize at the outset of that project was the enormous amount of seam matching - every 1.5 inches!! I also have left over pieces and have designed a quilt to use them up. Actually, have designed 2 and no final decision has been made yet.


Saturday, July 26, 2014
Ready to start making squares
I've lost count, I think this is the 3rd layout and now I'm ready to start sewing the blocks together. The blocks with the lights in the middle are set horizontally and the blocks with the darks in the center are set vertically. This quilt will measure, without borders, 85 x 85 and I can not get the 6 rows of darks and 5 rows of lights on my design wall all at once. I hope when the 2 layouts come together there isn't some glaring big clump of the same fabrics in one corner.
 here is the partial layout
 ready to start sewing squares together.
here is the partial layoutready to start sewing squares together.
Hop on over to Vicki's to see what everyone else is doing with their HSTs.
Friday, July 18, 2014
Not enough pieces
I need 36 dark HSTs and 25 light HSTs sewn into squares of 4 each. Since you can't make one without making the other I will have 11 full blocks of light coloured blocks left over. But that's for later, right now I had to stop the design layout and make more strip sets to make the dark quota. Then realized that I have to start my layout all over again so as not to have the new sets clumped in one part of the quilt. le sigh!

Friday, July 11, 2014
The first layout
Each strip set cuts into 8 HSTs and it was difficult keeping them far enough apart on the first layout of this quilt. The dark strips go in the center of a 4 set and are set vertically and the light strips go in the middle orientation and are set horizontally all in an on-point layout. WHEW! After getting this layout up on the board I realized that I can only accommodate 1/2 the quilt at a time. I've had to rethink how I am going to manage this designing challenge and spent yesterday afternoon cutting more strip sets and getting the design wall back into their 8 sets to start again with a better mix of the HSTs. This is to make sure the HST colour sets are not clumped on each side of the quilt but distributed throughout.
Head over to Vicki's to see what everyone else has accomplished.

Head over to Vicki's to see what everyone else has accomplished.
Friday, June 20, 2014
HST progress
Not too much progress on this quilt as I didn't attend the group this week where I work on this quilt but here are some strip sets on the design wall ready to be cut into HSTs.
Head over to Vicki's and see the other HSTeria participants.


Head over to Vicki's and see the other HSTeria participants.
Thursday, June 5, 2014
Slow to get started with this HST sew-along. I got lured into purchasing a jelly roll and then dithered about how to use it. Finally decided to make strip sets of 5, cut 10.5" squares from the set, (garnering 4 squares) cutting these squares in half on the diagonal and rearranging them one column horizontal and one vertical. Sized to be a bed quilt. Here is a photo of my start.

Friday, December 20, 2013
the studio reveal
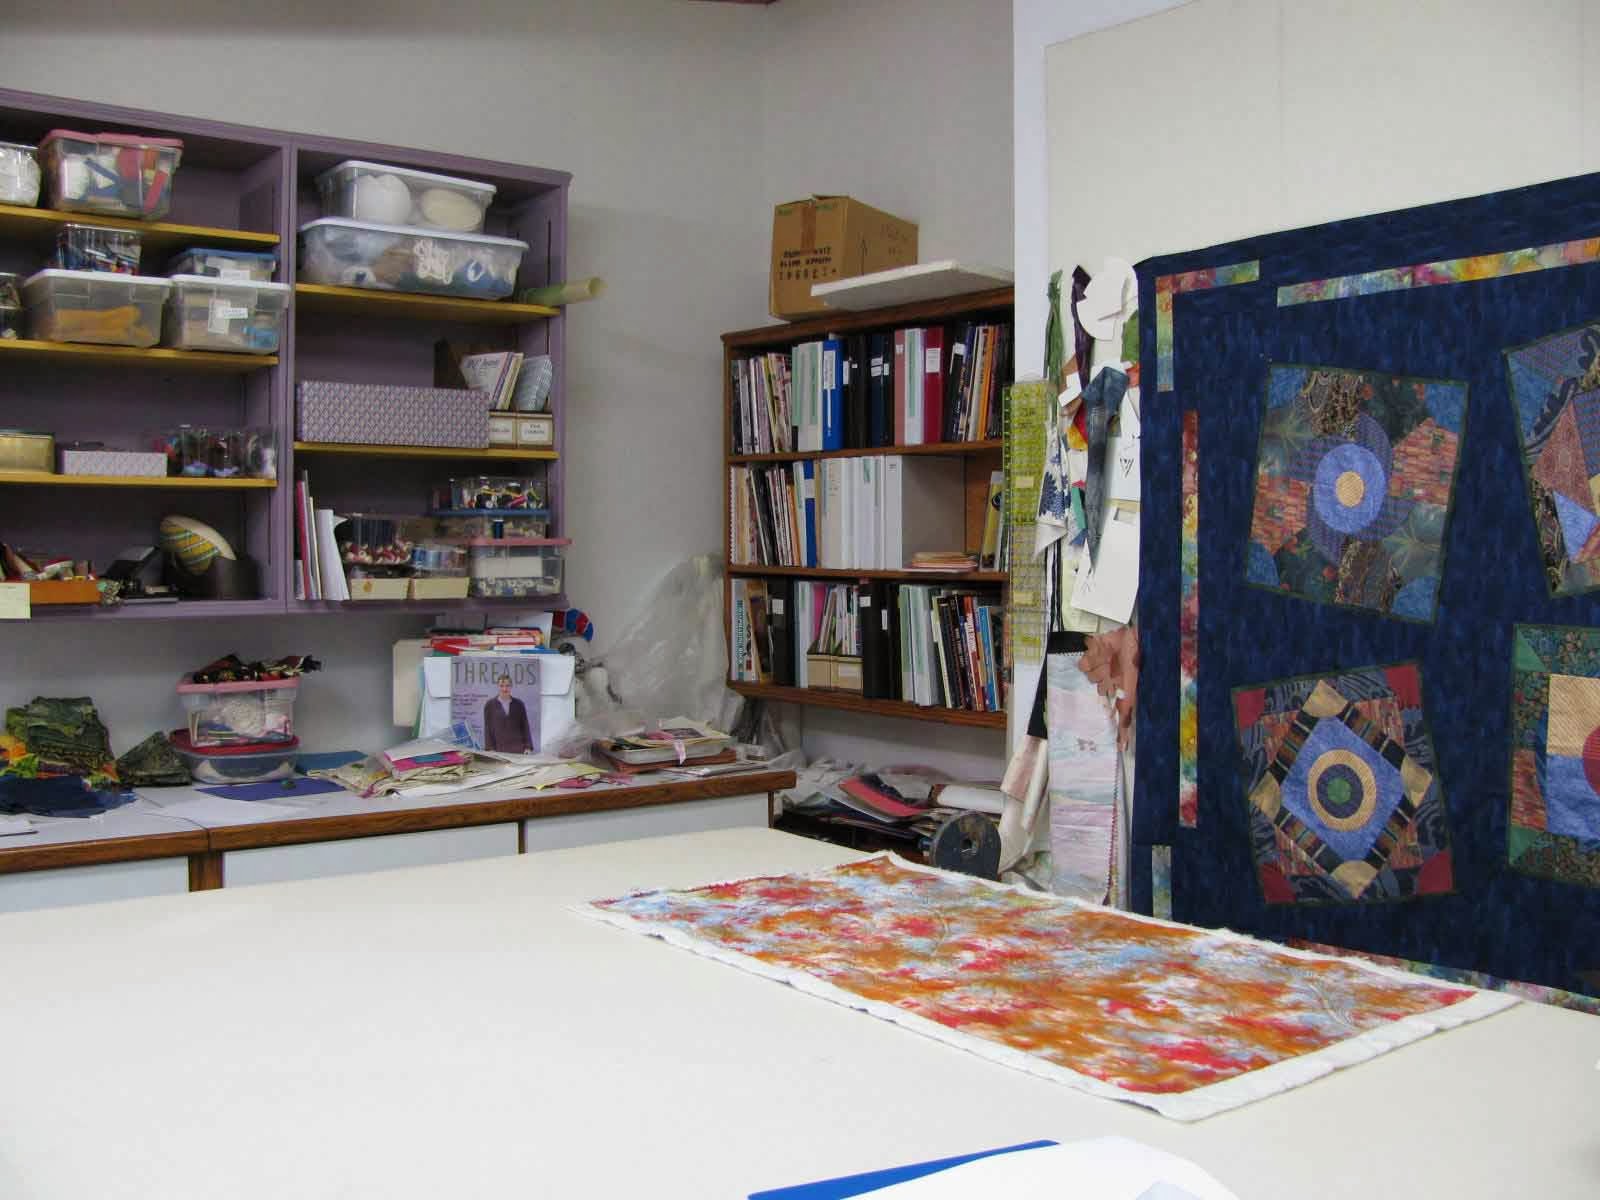
When Vicki decided to do the Real Studio Tour, I got up from the computer, entered the studio and started photographing; no cleaning up at all.
My room is about 13 x 18 and dominated by my huge padded work table which measures 60" x 90". I used to sew home dec which is why I have such a large table. I can iron on it and pin into it. It was constructed to be comfortable for my height. All sides underneath have built in shelving holding my extra machines and all my laundry baskets of fabric. This room was a family room with a vaulted ceiling and a fireplace. DH put hooks on the ceiling to drape my ironing cords to come from above so I could stop tripping on the cord and causing the iron to leap off the table. The back counter space seems always to have stuff on it no matter how hard I try to keep it uncluttered. Currently it has pieces and fabrics from the needle turn applique project I am doing. The piece on the padded table is a hand dyed fabric I did not like and used it for a practice piece for FMQ. That lump of white batting is draped over my fashion fitting double waiting for a sandwich to happen.


My room is about 13 x 18 and dominated by my huge padded work table which measures 60" x 90". I used to sew home dec which is why I have such a large table. I can iron on it and pin into it. It was constructed to be comfortable for my height. All sides underneath have built in shelving holding my extra machines and all my laundry baskets of fabric. This room was a family room with a vaulted ceiling and a fireplace. DH put hooks on the ceiling to drape my ironing cords to come from above so I could stop tripping on the cord and causing the iron to leap off the table. The back counter space seems always to have stuff on it no matter how hard I try to keep it uncluttered. Currently it has pieces and fabrics from the needle turn applique project I am doing. The piece on the padded table is a hand dyed fabric I did not like and used it for a practice piece for FMQ. That lump of white batting is draped over my fashion fitting double waiting for a sandwich to happen.

The design wall is build on the closed in fireplace space and holding a UFO that just got its borders added and is now ready to sandwich.
As we continue to move clockwise around the room is the door to the living room, the shelving built into the wall (which we moved back to make this storage deeper) and the curtained entrance to the room from the kitchen hallway.

Next we are looking at my machine desks along the window wall. I recovered my sewing chair and eventually will make dresses to match for my machines. That contraption you see hanging in front of my sewing machine is two clamps suspended on bungy cords to hold the weight of the quilt while I'm quilting on my domestic machine. (they are clamped to each other here to be more out of the way) When we first put these up, every time I entered the room, it looked like some S&M equipment!! Alas, I don't have any room for a long arm.

Last year, DH, very generously, gave up a corner of his shop to build me a wet/dye area. As it IS in the shop, I have to keep it really neat or be forced to dust and wash off everything every time I wanted to do anything here. Normally I keep it covered in old sheets. Ain't it pretty, I am so thrilled to have this space to be messy in and dye sure is messy.


Thanks Vicki for hosting this, it was fun to tour everyone's studios. The internet has certainly made a solitary passion much more sociable.
Monday, December 16, 2013
Snow dyeing
Here in the Pacific North West we typically don't get much snow and if we do it's gone in a trice. The last few weeks have been frigid and we got some snow. When it was still hanging around at lunch time I abandoned my afternoon plans and did some snow dyeing. Here are my results.


Sunday, December 15, 2013
Storage Solutions
On the Real Studios Tour we are looking at how we store our stuff. The plastic lidded bins have been a real boon for us in recent years and I'm sure we all use them. But when my studio pieces where being build I don't think they were available, so my big padded table and counters where built to accommodate laundry baskets stacked 2 high and 2 deep. I used to sew home dec and have lots of scraps sorted into colour-ways. Home dec scraps tend to very large because of the pattern repeats so my baskets are very full. Quilting cottons and fashion fabrics are also stored in laundry baskets.


As we don't have a basement or attic for storage we have re-purposed the den to be a gym and storage area because everything does not fit into my studio. Shelves were built for the closet and a shelving unit also lines one wall. Mostly supplies are stored in bankers boxes or copy paper boxes. When I'm going to do a craft, I just grab the appropriate supply boxes and take them to the wet or dry studio to use. It isn't very pretty and I'm thinking of running a curtain on a ceiling track to cover the wall shelving to make it more inviting to do my yoga in the 'gym'.


Friday, December 6, 2013
My Best Tool
Today starts the "Real Studio Tour" and our first showing is our best tool that is not traditional. My hands down best tool is my DH. He build everything in my studios except my chair. Everything: sewing desks, counters, padded work table with meg under storage, shelves, extra lighting, my wet studio/dye center, and on and on.


Sunday, December 30, 2012
FMQ December

Thursday, November 29, 2012
Free Motion Quilting November

 Our guest instructor for November is Sarah
Vedeler and she had us do spirils. I practised and practised with pencil and paper and eventually moved on to fabric tryouts and then put them in an actual quilt.
Our guest instructor for November is Sarah
Vedeler and she had us do spirils. I practised and practised with pencil and paper and eventually moved on to fabric tryouts and then put them in an actual quilt.
Tuesday, October 30, 2012
October Free Motion Quilting Challenge

Subscribe to:
Posts (Atom)